Sunday, June 9, 2013

Step-by-Step DIY lightbox...all for a small fraction of the cost!


As promised, here is the step-by-step guide to making your own lightbox for photography.


Step 1:
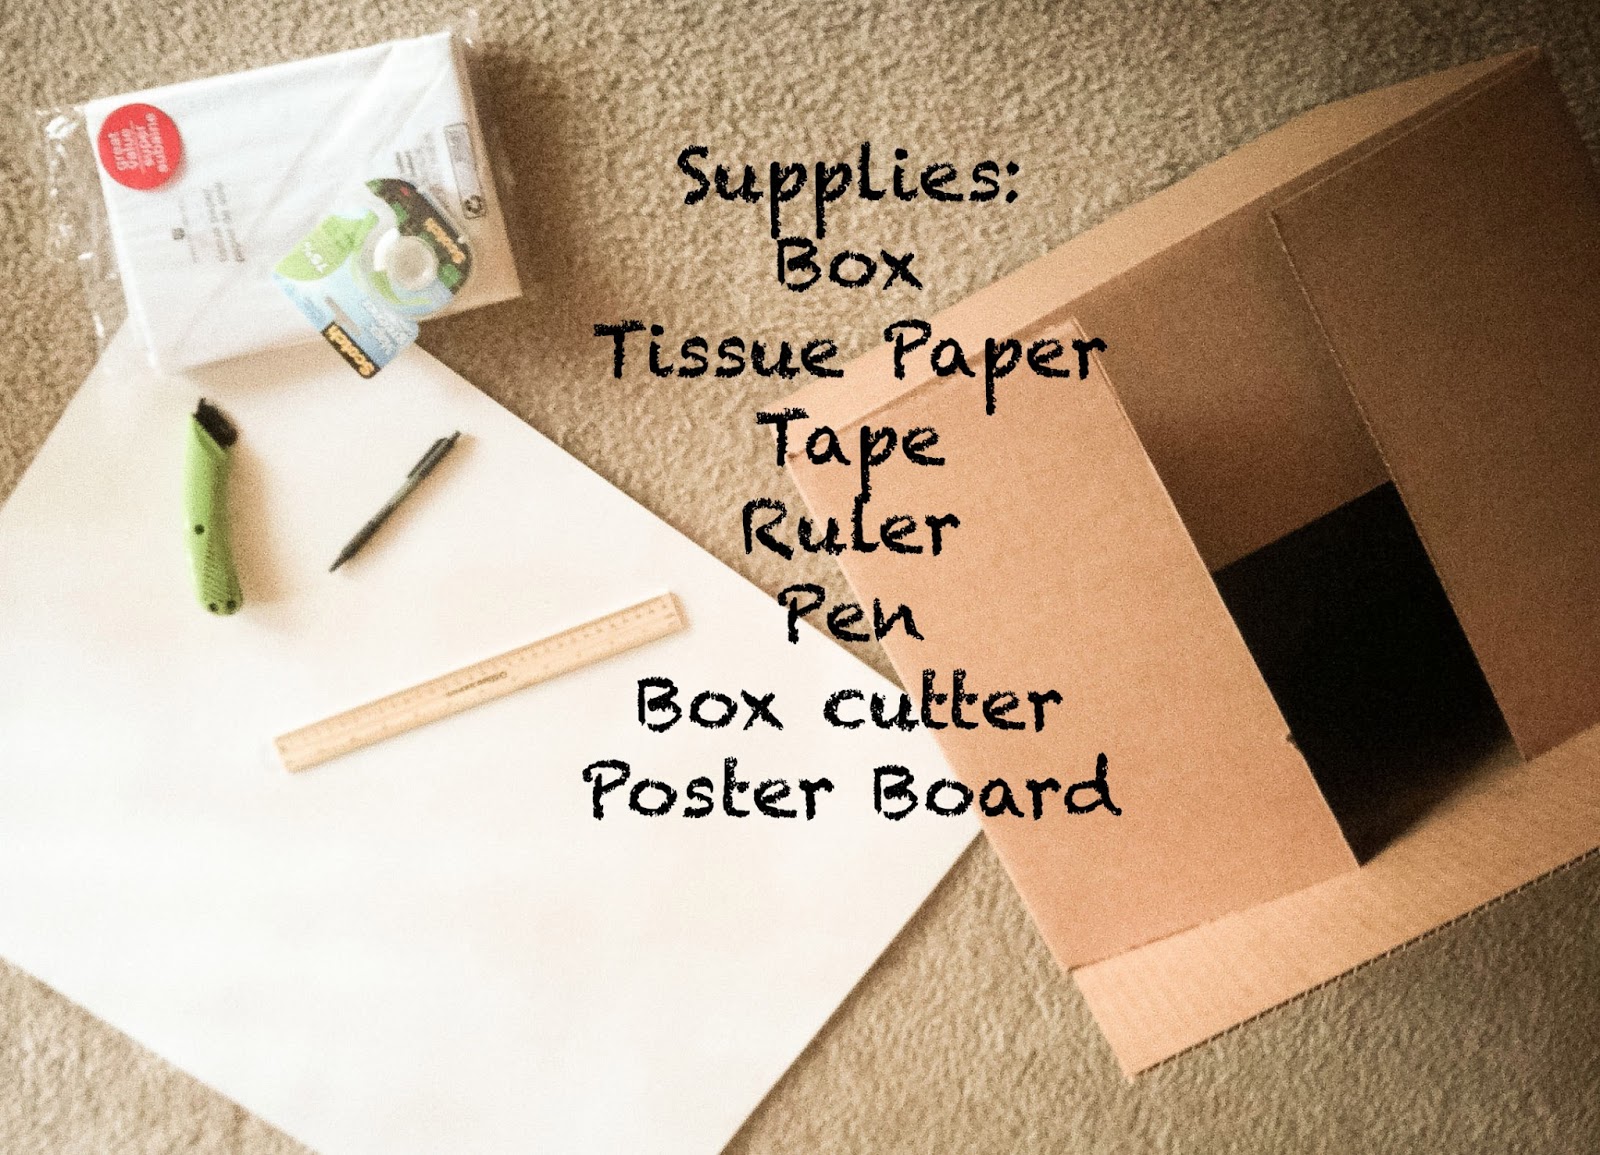
Gather supplies. I was able to find almost everything at the office store with the exception of the tissue paper. Keep in mind you also will need a bright light source x2, one for each side of the lightbox.
I have lights already so I spent just under $15 for all this. If you don't have bright lights that can be used, they can be found at Target or fredmeyer for around $10 a piece. The lights don't really have to be fancy, just make sure they are bright. The unfortunate thing about buying a pre-made lightbox, is the lights aren't always strong enough, this way you can gaurentee adequate amount of light


 Step 2:
Tape the bottom of the box. Using the box cutter cut off the four flaps on the opposite side that was taped.

Step 3:
Using the ruler draw an even border around the edges of 3 sides of the box. I used the width of the ruler to make my border.

After removing 3 of the sides of the box you should be left with something that looks like this:


Step 4:
Cut one piece of tissue paper to fit each side of the box that has a cutout and tape it down. Make sure to not overlap the tissue in the cutout sections to ensure even lighting.


 Once the three sides are covered you should have something that looks like this :


Step 5:
Take the poster board and cut it to fit along the inside of the box. When putting the poster board in the box make sure to have a curve on the bottom and not a 90 degree crease. The point of this is so you don't get any extra unwanted shadows when photographing. It will allow the background to appear seamless which = great photos.
Tape the top edge of the poster board to the top of the box to make sure it doesn't slide out.


The final product should look something simular to this:


 Now all there is left is to play with the lighting. Put a light on the left & right side and take some great photos! Also play around with having a light source on the top. Having this lightbox can be a real asset and has endless possibilities.
In my next post I will show some of my work with my new lightbox!


Saturday, June 8, 2013

DIY can save !


So June is upon us. Wow how time flys!! Last month was a busy one for me. I finally made my decision on which hosting company to go with, (photoshelter) and have been very happy with it! It took more man hours than i'd like to admit to get the site up and going with all my content but I'm happy to announce my official website of www.KTKreationsPhotography.com Take a moment to check it out!


Today I wanted to touch on product photography and how important a light box or mini studio is. A key aspect to taking good photos is understanding lighting. The same exact photo using 'proper' lighting I guarantee will look better than one without the lighting aspect planned out. With that in mind, that's not to say one could't take the rules of lighting, and break them, in order to achieve an artistic look.
It is important to know and understand rules of lighting to be able to achieve great photos.

I could go on Ebay, or any other photography store online and find a professional lightbox. They seem to run anywhere from $60, $80, $100 plus. There is also a famous saying that goes, "You get what you pay for.". So logic would say the cheapest might not always be the best quality. I however have found great resources for a pretty easy DIY project.  Making my own lightbox also allows me to customize the size to exactly what I want. I plan to spend less than $20 on this project.

The items I will be needing for this project are,

  • A sturdy box
  • Utility knife
  • Tape
  • Tissue Paper
  • Poster Board
  • Good source of bright light x2. 

Because I already have a pair of softbox lighting I will be able to use those for each side so my total costs of this project are even less. However if I didn't have my lighting, I could easily go to a place like target and find a pair of desk lamps.

I will be posting my final project with photos and step-by-step instructions.


Friday, May 17, 2013

Sometimes you just have to jump in head first.


So much of the photography business is business. It's not as simple as just taking good photos.
If you don't have a good starting direction it would be very easy to get lost. Between social media integration, picking a website hosting, domain hosting, blogs, and that seems to just be the tip of the iceberg. 

Im in the position currently of trying to find the best place for my website. There are SO many options and different aspects and bells and whistles to weigh out. There's not only the layout and appearance, but store front options, security, print proofing, and membership fees. It's really enough to make your head spin! 

In my search over the past week I have gone through numerous options and various hosting sites. It seems like the search could potentially go on forever. One thing I have realized is as many examples as there are out on the internet nowadays, you really have to go with the best choice for YOU.  What might be the most important aspect to you might not matter as much to a fellow photographer. 

I am confident within the next few days I will be able to decipher my notes and make my final decision. Then I will be able to really start putting together my professional website. 

On another note, Im starting this blog to share my thoughts, experience, inspiration and anything else photography. From time to time i'll add my own personal photographs and critique them myself and would love the input from others as well :-)